Showing posts with label OPI. Show all posts

Friday, August 26, 2011

It's been awhile!

I went on a little bit of a hiatus for the past couple of weeks while I was house-sitting, at the Ohio State Fair (seeing my new boyfriend Blake Shelton, omg) and seeing Poison and Motley Crue (which was an AMAZING show) and doing some running around. I'm back now though and even though I wasn't posting, I didn't forget to take pictures of anything that I did on my nails so now there's going to be a post flood!

So I've been getting the hang of this Konad thing. One of my favorite stamps is the little bow so it shows up on a lot of my manis. I also got a pretty nice polish haul for the end of summer and wanted to play with as many of those as I could. This one features my new Essie polishes, Nice is Nice (a great creme lilac) and Mint Candy Apple (a minty creme)


Now, I'd been having a problem with my nails that I couldn't figure out for like a week, it was ridiculous. If I did a light colored polish (which had been mostly blues) I would get these dark blue streaks around the tips and I thought it was my top coats smearing when they dried or something. I tried different top coats, no top coat, but whatever I did, I still got these streaks. I was going crazy until I realized what it was. I had just gotten my hair done and the for some reason, the color was transferring to my hands, nails and all over my neck. My hair is a blue-black base color with thin highlights of bright blue. My neck was blue when I pulled my hair up, I had blue stains between my fingers, my brush bristles turned bright blue, but it wasn't transferring to my clothes or my pillow cases, so I guess it wasn't too bad but was it ever irritating. I rarely wear my hair up unless I haven't washed it in a day and eventually it stopped transferring... just in time for me to have to get it redone on Monday. So my new manis are going to be dark colors while I ride out the staining period.

Bonus! I did my toes with my Konad stamps as well! 
I also bought Essie's Matte About You so I wanted to test it out. I was obviously on a blue kick so I went with OPI Ogre the Top Blue and made it matte, added some zebra stripes and silver glitter accents.


Tuesday, July 12, 2011

Tutorial: Pac-Man!

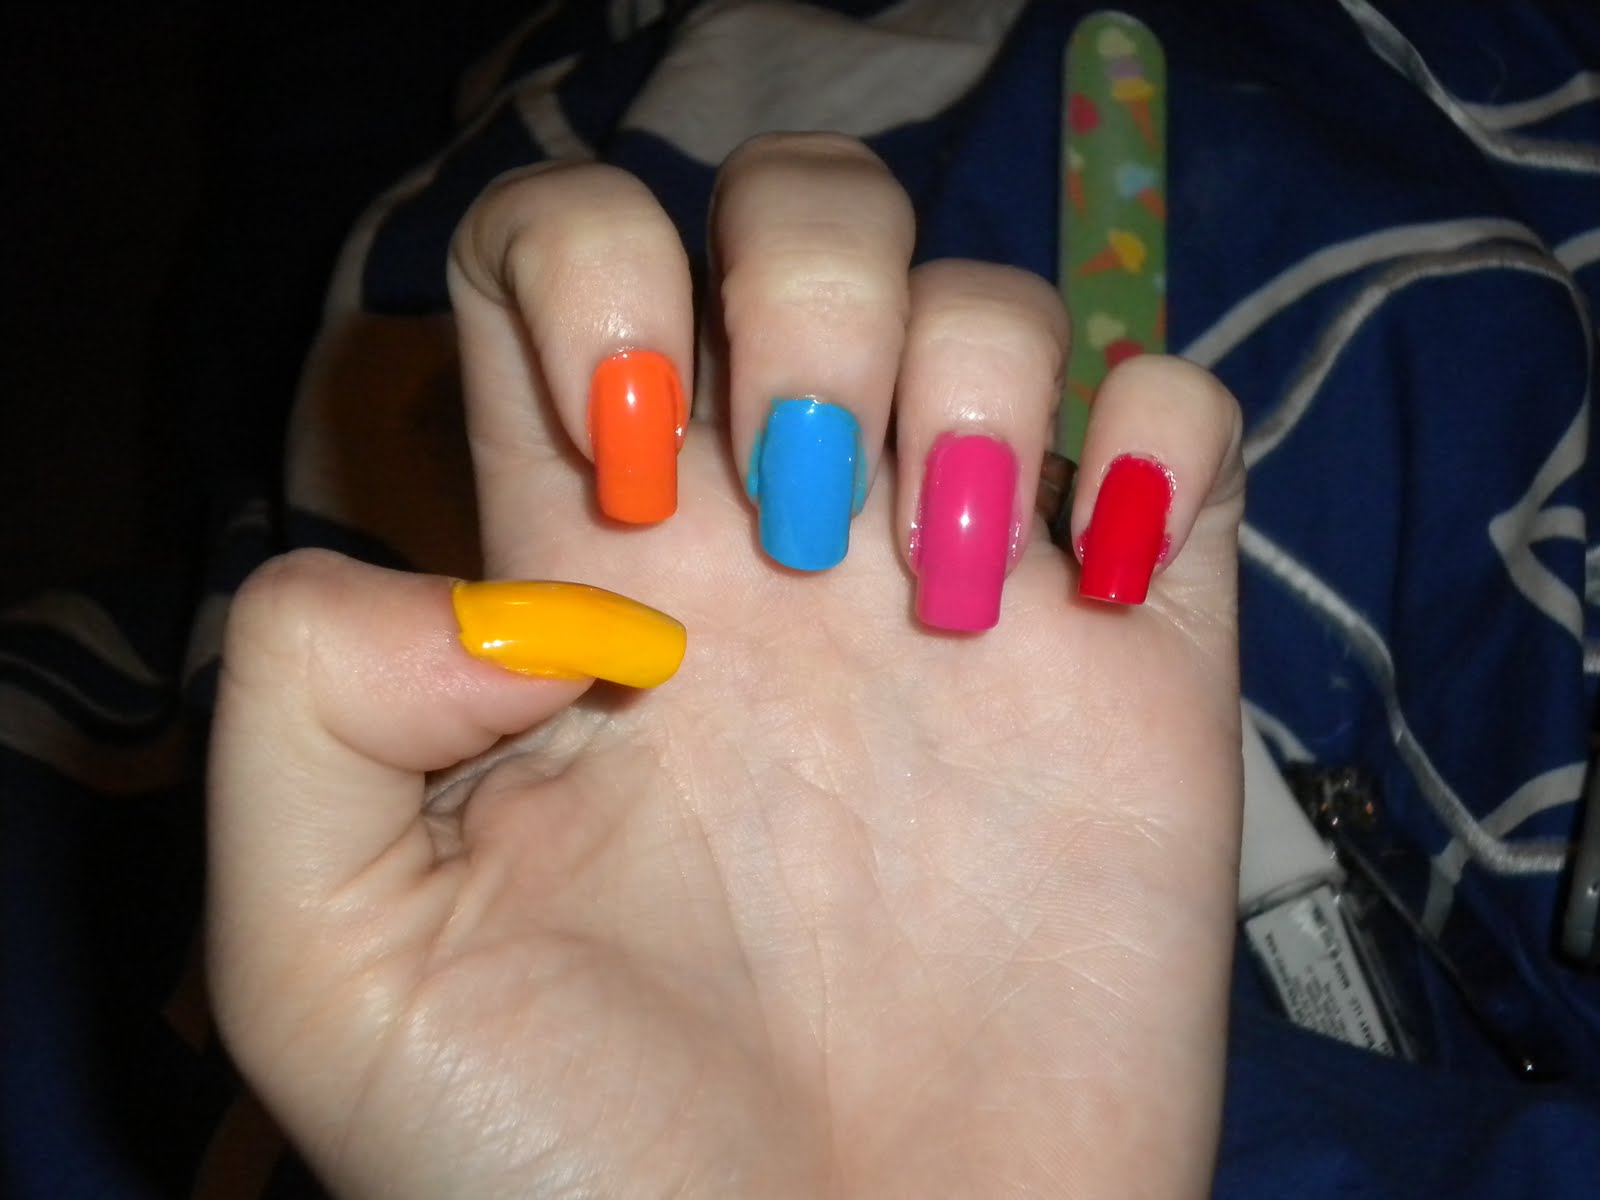
Today I decided to do a nail design that my husband would enjoy. He's the typical guy, he sees my nails and 'Oh that's nice...' so I figured that I would put something on there that he would pay attention to. I still don't have my Konad stamps so I went back to my nail brushes and googled some pictures and decided that I'd do a little Pac-Man scene and this time, I took pictures of each steps so I could put together a tutorial as well. So productive today!

What I used:

From pinky to thumb, I used
Sally Hansen Complete Salon Manicure Right Said Red (best true red ever!)
OPI That's Hot! Pink
Sally Hansen Xtreme Wear Blue Me Away
OPI In My Back Pocket
OPI The 'It' Color
Stripe Rite Black
Stripe Rite White (Not pictured, I thought I was going to use Whirlwind White but changed my mind)

Start by painting each nail a different color. Order doesn't really matter but the thumb has to be yellow.

Then I used the Stripe Rite to draw the bottoms of the ghosts, just three little trangles at the tip of each nail.


On my thumb, I drew a V down from the tip of my nail to just above the center, like a < sign, but enough that it will look rounded when you're done. I filled that in with a regular black polish since the Stripe Rite can clump if you try to use too much of it. After that, I essentially did an inverted french tip to finish the half-circle shape of Pac-Man and filled it in as I did before.
With the white Stripe Rite, I added the eyeballs for the ghosts

Add little black dots inside the eyes so the ghosts can see


Finally, you add an eye for Pac-Man. Finish with a top coat, but make sure everything is completely dry. There are a lot of little details that can very easily smear if you drag a top coat across it.

When I finished it, I called my husband to come see the Pac-Man nails and he loved them! He didn't want to admit that he thought nail polish was cool, but he couldn't resist something nerdy :) It's actually pretty easy to do once you break it up in steps, but the most important thing is to just let each step dry before starting the next to avoid smudges and smears. Enjoy!

Thursday, July 7, 2011

Stained Glass

 This was my first nail adventure that I thought to photograph. It's taken with my phone, so I apologize for the quality, but I didn't expect to be publishing them! I wanted a bright look that was more than just a solid color one day and just started experimenting with color. You don't have to do these exact colors (I thought of doing different blues or pastels, for instance) but try to keep them all the same finish so the end result flows nicely together.
What I used:

OPI That's Hot! Pink
OPI A Grape Fit
OPI The 'It' Color (by far, my favorite yellow)
Sally Hansen Complete Salon Manicure Grass Slipper
OPI Dating A Royal
Stripe Rite Black

This is actually a lot easier than it looks and application doesn't have to be perfect because you're filling in where the colors meet with the black line. Simply paint shapes in each color on the nail, as carefully as you can (but once again, any goofs can be covered by the black polish) and outline the area where the colors meet in black or any thin stripe of an accent polish that you choose. I wish I'd taken pictures of the steps so I can show how easy this really is. Your end result will look like a stained glass window, but I like to think of it as a paint by number :) Get creative- you don't have to put the same pattern on every nail and the same colors don't have to always be touching. Have fun!